Bad Axe Toolworks Review
I first used one of Mark Harrell’s new tenon saws at the hand tool olympics at the Woodworking in America design event last August in St Charles, IL. At the time my dovetailing skills were actually better than my tenoning skills because I had spent more time practicing dovetails. Needless to say I was shocked when I cut my tenon so easily and based on the measurement, I was vaulted into 3rd place in the competition (at the time anyway, and there were many more than 3 competitors for you jokers).
No question that tools do not make the craftsman, but they sure do help. I blame the TSA and baggage restrictions from keeping me from buying one of those saws right then and there. Then in October at the hand tool rendition of Woodworking in America, I cut some tenons again using the same saws. I was not competing this time since I was helping out at the SAPFM booth and therefore ineligible. (Pro tip: this is a great way to get out of a competition, “I’m ineligible!”) I got the use the saws a lot more while hanging out at the booth and let’s just say I had an identical experience. I walked away and vowed to contact Mark and place my order. And order I did. I have been the proud owner of rip and crosscut Bad Axe saws now for 3 months and have had a lot of time to work with them. No buyer’s remorse here and I just love these saws. Let’s take a look at some of the features that make them so great and what it means for your work.
Handle
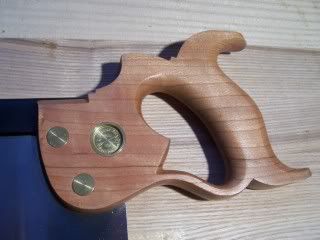
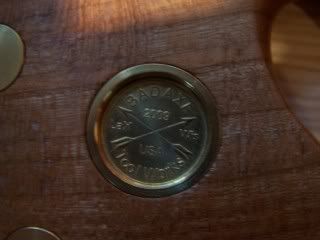
These saws have a beautifully formed Cherry handle that is modelled after the golden age of saw manufacture. The Cherry is a surprising species with so many fruit woods being used in the past, but Mark is very picky in the blanks he chooses to obtain the most stable cut and pleasing grain. Like the blued steel back, these Cherry handles impart a simplicity that is like comfort food and just feels good to look at it. The handle is carefully shaped to be easy to grip while not interfering with the sawing motion. I have pretty big hands and I didn’t feel like I was crowded at all. The handle smoothly flows into the back with a nice chamfer to rest your forefinger on while sawing. Then as a finishing touch, Mark incorporates these beautiful inset medallions.
Length, Width, Pitch

At first glance both of these saws seem really big and the depth of cut beneath the backer is bigger than any vintage saw I have seen. This height is really valuable in keeping your cut plumb because the whole saw is well balanced and just like balancing a long broomstick on your finger the extra height adds a better center of gravity.
Mark will soon be offering a 14″ version of his saw as well but for now you can get a 16″ and 18″ version of the saw. The 16″ offers a 4″ deep saw plate whereas the 18″ long saw has a 4.5″ deep plate. Like the saw restoration service you can specify how you want your saw toothed and sharpened but Mark recommends to following and this is what I purchased from him.
18″ Rip saw sharpened at 10 ppi
16″ Cross cut saw sharpened at 12 ppi
The saw plate itself is high quality Swedish spring steel and is beautiful to look at as well as durable in use and in regards to tooth strength.
Tooth Geometry
This is where the real money maker is with these saws. Mark uses a few tactics to provide an easy to start, clean, yet aggressive cut.
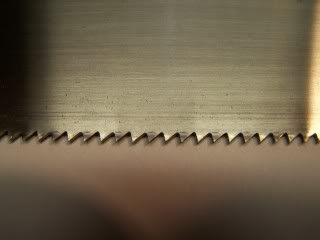
Progressive Rake: by adding variabiity to the attach angle of each tooth the saws will start smoothly but transition to a faster cutting tooth then relax back to decrease tear out on the opposite face of the board. The transition is difficult to pick out readily but on close examination you can see the subtle change. The following is taken from Mark’s website detailing his filing technique with some photos of my own saws thrown in to illustrate the rake transition.
Rip: I start with a 15-degree rake at the heel for the first twenty teeth, then modulate to 10 degrees for the next twenty teeth. From there, I rake every tooth is at 5 degrees for an aggressive cut. I add five degrees of fleam on every tooth (regardless of rake), which reduces tearout on the opposite side of the cut. The rake relaxes again in the same manner at the toe end of the saw. After conducting the initial filing to set a consistent rake, I then rejoint the saw, establish 20-degree sloping gullets, and file off the points without shortening adjacent teeth so that every tooth does its duty.
Crosscut: The rake modulation for the first forty teeth goes from 20 to 15 to 10 degrees at the heel end of the toothline, then I reverse that for the last forty teeth at the toe end. 20 degree bevels per tooth, and 10 degree sloping gullets. Though ten degree rake for the majority of the toothline is an aggressive cut, It achieves a surprisingly smooth finish on the wood.

The addition of sloping gullets is still a debated technique (one I am for BTW) but in theory it not only provides a little extra space in the gullet to clear sawdust but it can also provide a slightly keener tooth.
Like everything in life, too much of a good thing can be very bad. The same applies to saw filing. Fleam will slice the wood and make for a cleaner cut, but too much fleam will dramatically weaken a tooth. Mark strikes the balance needed in rake, fleam, slope, and pitch to give us a revolutionary saw.
If you weren’t already sold, then remember that Mark Harrell is a veteran who served his country for almost 30 years with dedication and passion. Since his “retirement” Mark has sunk his considerable talents into saw making and restoration and we are all fortunate to have him around to make us all better woodworkers.
Please take some time to visit Bad Axe Tool Works. The site is clean and beautiful and chock full of information and tutorials. Mark doesn’t have any secrets and he lays out everything in his bag of tricks so that the average woodworker can produce the perfect saw too.
