Inlaid Plaque with a Chisel
In a recent video I showed the process of creating a 24″ long hinge mortise using nothing but a chisel. I could have done it many other ways, but my point was that sometimes breaking a task down to it’s purest form can be a helpful exercise. Building chisel handling skills is very important to woodworking because there will be a time when only a chisel will work. Low and behold, a situation like this came up just this weekend.
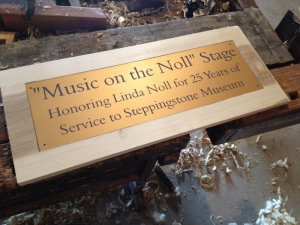
Recently, the director of the Steppingstone Museum retired after 25 years of service. A plaque was made to honor her and to dedicate our timber frame stage to her. An exchange of emails last week informed me that the woodworkers had been requested to build a frame for the plaque to hang at the back of the stage. Oh yeah and could it be completed by 4 PM on Saturday so that it could be unveiled at a retirement party. No problem right? Plane a board to size, stick a moulding, plow a rabbet on the back, join the corners (I was thinking mortise and tenon to match the stage structure), and hang it on the stage. Probably a few hours of work.

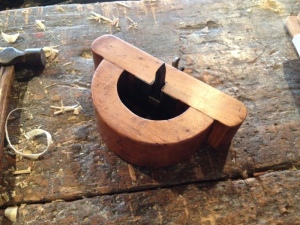
I really enjoyed using this plane. It has much more visibility of the cutting action and a really wide surface area. This is on my build list for the future.
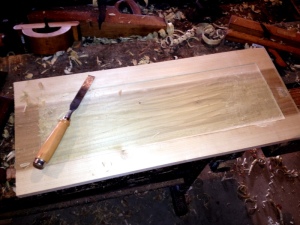
When I arrived at the museum on Saturday I found one of my fellow joiners (the former shop master), already in the shop at work. Apparently he had a different design in mind and had already sized a single 12″ wide slab of Poplar, knifed in the plaque outline, and had begun sticking a cove moulding using a cavetto plane across one end. Since the plaque was only 1/8″ thick he felt that inlaying it would be better. Not one to disagree with the former shop master I was certainly not going to suggest we start over and use my plan. In fact, I was pretty excited by the prospect of doing an inlay. Now here is the rub: the inlay was wider than our router plane could span. Once I had set in the perimeter of the inlay using a chisel I was able to use the router plane to clear about an inch deep into the inlay field but no further. I could have tacked a wider board to the router plane to span the gap but the museum doesn’t take kindly to me drilling holes in their vintage tools. So based on the tools I had on hand, a chisel was the only route.
 The plaque is 15″ wide so I was able to get a scrub plane into the center of the inlay cavity to quickly hog out the material in the middle. I needed to excavate wood right up on the perimeter and about 5″ in from both ends so the scrub plane would have space to run. This leaves me with an area 5-6″x12″ to clear with a chisel.
First I set in the perimeter using a 2″ paring chisel. Then with the chisel bevel down and working in a slicing, skewed aspect directly across the grain, I hogged out the bulk of the waste to a depth of 3/16″ I wanted to recess the plaque a bit below the surface so the frame would have a drip edge. Though the sign would be hung under the roof of the stage, you can never be too careful. I have to admit this was really satisfying work. It has been said before that hand tool woodworking connects you to the wood, but when you strip away the planes and fancy tools to the purest form: a chisel blade, there is something instinctual that harkens back to our Neanderthal and Cro-Magnon ancestors.
 Once I had finished the inlay, I switched over to the cavetto plane. It needed a little honing to cut cleanly on the cross grain, but after visiting the oil stones, it was humming along and I have a nice edge treatment. I smooth planed the surface and I was all done. Unfortunately I didn’t get a picture of the completed sign with the edge moulding as mother nature got very ugly very fast.

The view from the stage where I was installing the sign. It was like a wind tunnel as the storm moved in.
With a monster thunderstorm hurtling up the valley from the Susquehanna River, I found myself perched on a rickety ladder underneath a timber frame structure furiously drilling pilot holes into huge White Oak timbers with my eggbeater drill. Now was not the time to strip a brass screw. By the time I had the sign hung we were in a cloud burst and could do nothing but sit in awe of the storm. The rain and wind was a welcome relief after a morning of hard work in a period shop with no AC and no breeze and it was nice to cool off. On the whole, an outstanding way to spend a Saturday!
Your Turn
When has a chisel saved your bacon? What other “basic” tools/skills do you use time and again when all else fails? Please share your experience and insights below.


