Little Project, Big Skill Builder
 WHACK! The maul hits the froe.
CRACK, POP! The froe splits the wedge of Poplar and a piece pops free along the grain.
Off to the shave horse and with the squeaking of the foot pedal I’m slicing through green Poplar with joy as my drawknife neatly shaves off the corners of my newly riven blank. The radial plane shaves easily and cleanly as the wood cleaves along the natural lines of weakness. Rotate 90 degrees and shave the adjacent face flat and square to the first. I should use a gauge to mark a consistent thickness that I can shave too, but I just eyeball it and shave 2 parallel faces to make a square blank around 1 1/2″ thick. Now knock off the corners and make it an octagon. I admit I’m having a bit too much fun with this and once my riven blank becomes an octagon, I keep going until I have something closely resembling a dowel more than anything.
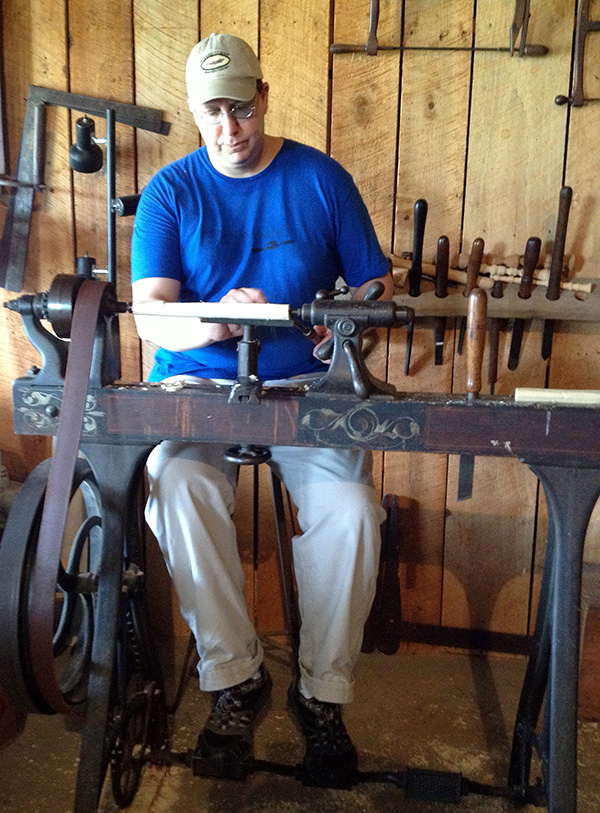
Over to the treadle lathe. I chuck up the blank and lighten tighten the tailstock then start pedaling. This Barnes lathe hums along and rivals any modern electric lathe I have ever used. Within minutes I have a smooth cylinder. Now I get to play! A bead here, a cove there, my gouge dances over the wood creating a shape that looks nice but will also be comfortable in the hand. Switch to the skew chisel and plane the surface to perfection while the rubbing bevel burnished the wood to a shine. Careful here. The perfect shape can be spoiled with one cut too many and it is better to move on before this piece becomes too thin from playing around.
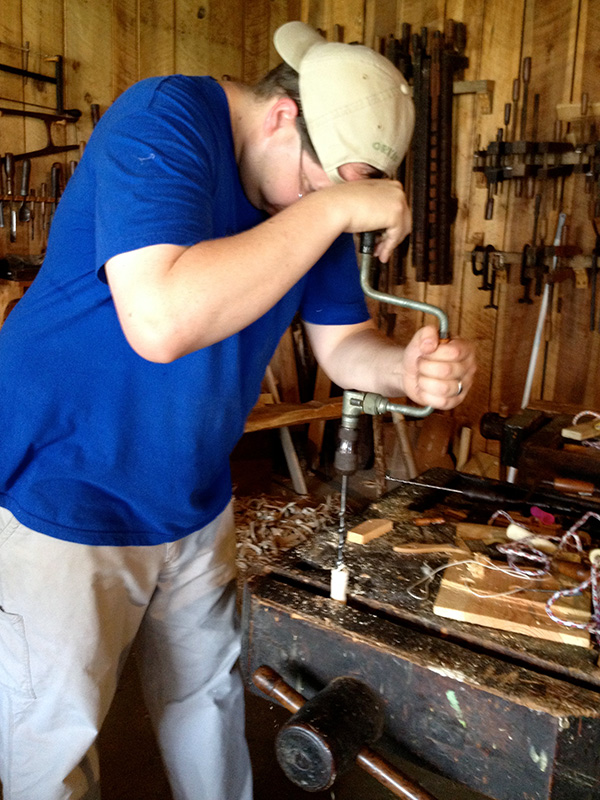
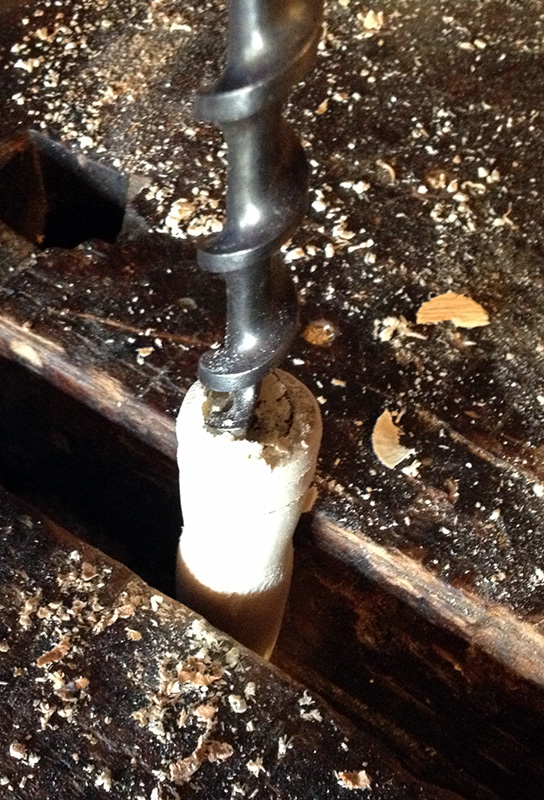 Now the hard part. A stepped through hole right through the tough end grain. My gedge pattern bit is a bit dull and I’m too in the groove to stop and mess with that problem child. No worries, I have a nose auger that is ready to go. First a 5/8″ hole bored to about 1″ deep. I place my forehead on the brace pad so I can sight down the auger shaft and get a square hole. Now switch over to a 1/4″ bit and bore through the 6″ long blank to just past the halfway point. Stop to check for square and plumb along the way. Now flip the blank and bore through with the same bit to connect cleanly with the first hole. It is pretty satisfying when the holes meet up nicely deep inside the blank. It’s nice to know you can bore a hole so precisely with these ancient tools and a little practice.
Now push the rope through the 1/4″ hole by using an 1/8″ auger bit. Tie a knot in the rope and pull the know up tight to but up against the 1/4″ hole and nestle nicely into the 5/8″ counter bore, hiding it completely. Repeat on the other end of the rope.
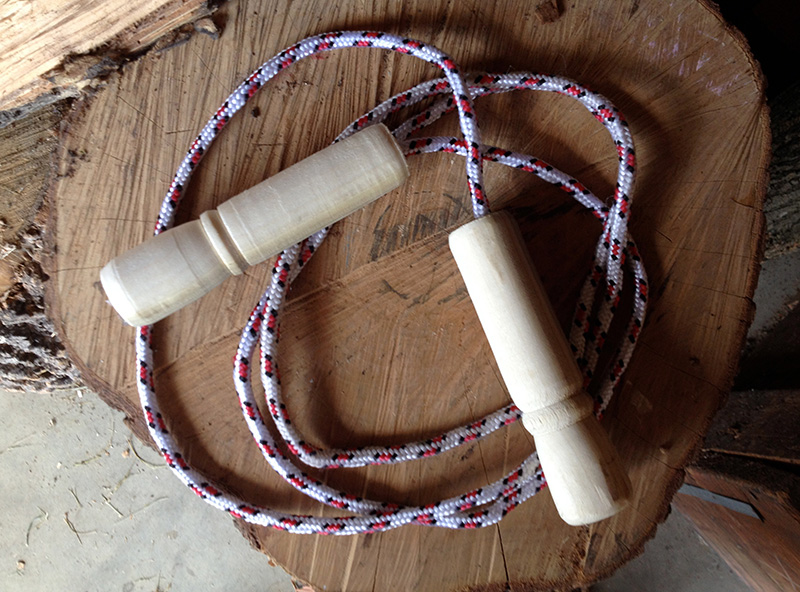 Finally hand the completed jump rope to the little girl who has waited patiently and rapt with attention as her toy is created from a log of Poplar. She squeals with excitement and dashes out of the shop into the grass and sunshine with her new jump rope.
The project doesn’t have to be complex or even pretty, but the skills gained along the way are invaluable and the reward of seeing the finished product being put to use so enthusiastically is simply priceless. Gotta run a line of little girls is forming, eager for their own jump rope.
Your Turn
Ever built a project that was overbuilt just to teach an strengthen a skill? How about a project that was so simple yet was received with astonishment and gratitude? It does make our woodworking pursuits even more rewarding doesn’t it? Please share your projects and experiences below.
