Masterpiece Wood Finish
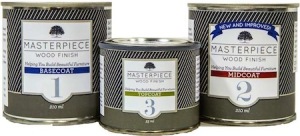 One of the great things I have found about running The Hand Tool School is is constantly forces me out of my comfort zone and trying new things. I find this most apparent when it comes to finishing my projects. Let’s face it crafting an interesting video about finishing wood is tough enough but when you find yourself using the same few finishes over and over again it is even tougher. So it was when I completed the last project of Semester 5, a pedestal table based on the Hancock Shaker Table, that I thought it was time to demonstrate something new. That something was the 3 part oil and wax finish made my Masterpiece Wood Finish
.
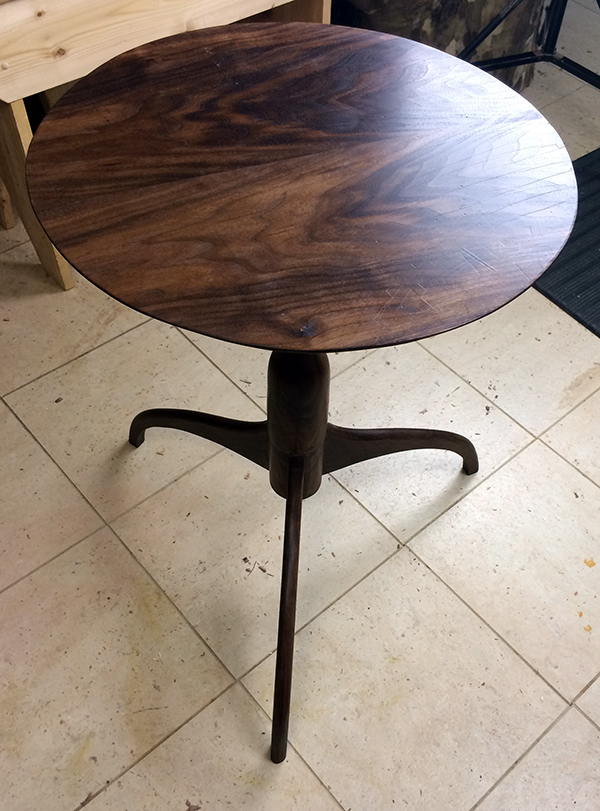
I have done an oil and wax finish before on small boxes and keepsake items but never on a furniture project. Truly this isn’t a highly durable finish and not maintenance free either. If your furniture will get a lot of heavy use then this may not be the best solution or you may want to combine it with a varnish top coat or something similar. For this table it will be fine as the most use this will get will probably be a vase of flowers or the occasional paperback book. The real winner about this type of finish is the oil base coats that sink into the wood and give it that depth of color and natural luster. I built this table from some beautiful Walnut that already had lots of contrasting purples and tans and chocolate browns in it as well as a bit of curl figure on the central column. I knew the oil would highlight this character well. The addition of wax gives the woodworker the ability to adjust the shine of the finish while still keeping that depth and close to the wood finished look and this seemed like the perfect thing for my lovingly created table.
As best I can tell, the Masterpiece system while not terribly different from a can of Linseed oil and some paste wax, it does simplify some elements and make the application pretty idiot proof. I haven’t been able to get a clear answer on what “blend of oils and waxes” they employ (trade secret no doubt) and how this makes their finish superior to the DIY method but the step by step instructions and premixed jars of finish do make the whole think a lot easier with no guesswork. So if we assume the actual finish is no different then I think this system still comes out ahead in application ease. But I’m getting ahead of myself, lets break down the process:
Step 1: 2 coats of the oil base coat
 This is the money coat! The dry wood is very thirsty and it will soak up the oil quickly. You want to apply a very wet coat and give each coat about 20 minutes to penetrate then wipe off the excess. Then allow at least 24 hours to dry between each coat. It doesn’t get any simpler than this. I even rubbed it on with just my fingers (with gloves). Immediately it brought the wood to life.
Step 2: 2 coats of oil and wax blend
The mid coat step I do think is a plus over the DIY oil and wax finish as it acts as a pore filler to give you a ridiculously smooth final surface. If your project is using a closed grain wood like Maple or Cherry then this may not be a big deal to you but with a semi ring porous wood like Walnut, it really leveled and smoothed out the surface nicely. Unlike the base coat this step is more like applying a really viscous wax. It is even a bit grainy in texture. I found this step worked best if I heated the jar a bit in my glue pot water bath and it allowed the finish to flow more readily. You slather on a heavy coat, let it soak in for 20 minutes then come back and wipe it off. Allow another 24 hours to dry between coats here as well as there is still oil in the mix and without proper drying time the surface will be tacky. Don’t panic it goes on in a white, waxy, pasty mess and covers up your beautiful oil finish. You immediately start to panic thinking you just ruined it but when you come back and wipe it down with a paper towel you see the magic come to life. Use a little elbow grease here to build up some heat and you will start to see a lovely warm luster spring up out of the wood. 1 coat at this phase would probably work for most species of wood, but I found the 2nd coat to be an insurance policy to make sure I had a perfectly smooth surface for the final step.
Step 3: 1 coat of wax
 The final step is all wax and it looks and applies just like you would expect it. The key here is less is more. Wipe too much wax onto the surface and you will end up with a hazy white-ish surface later on. The process is to wipe on the wax, let it dry then buff to the desired luster. The drying time really depends on how thick a coat you apply. Again err on the side of a really light coat and you can expect it will be dry and ready to buff in a few hours or to be safe 12 hours later. If you find that you didn’t apply enough wax you can always apply another coat but I can’t overstate how you want to be careful how much wax you apply. I actually waited almost 36 hours for the wax coat to dry (life intervened) and buffed the surface to a nice satin finish just using a paper towel. I then waited another 2 weeks for the finish to fully cure before going back and buffing again. If a high gloss finish is desired I would definitely wait at least 2-3 weeks before attempting it as you want the wax to be dry and hard. Though if a high gloss is your aim then perhaps going with a different finish altogether is a better option.
There is no question this is a labor intensive finish and expect to take at least 5-6 days to complete the finishing process. Then add a few more weeks to the mix for that curing time during which you want to put the piece in a well ventilate area and put nothing on the surface. The results I think speak for themselves however as the hand rubbed finish looks nice but most importantly feels incredible. This is a good thing because the finished look begs to be touched and you will find everyone who sees it immediately reaches out to run their hands over the wood.
Another nice factor of this specific finish system is they provide you just enough to complete a typical project. For my small little table I had about half of the volume left over but I imagine a chest of drawers or a chair or table would use up the entire amount as designed. I would plan on having top coat left over and for at least an annual reapplication as needed to maintain the luster. This is one of the drawbacks to a wax finish as ongoing maintenance is may be required. A lot depends on where the project sits and what kind of use it gets and how it is cleaned. Some dust products have oil and wax in them while others actually strip away wax.
If more durability is required then you might skip the top coat of wax and apply a varnish top coat. If you are worried about adhesion after the oil and wax mid coat then a wash coat of 1/2 to 1 lb cut Shellac will ensure a good bond for your top coat. I would use a super blond Shellac too so as not to impart any additional color.
In the end, I have a mixed review on this finish. It worked as advertised and I have no complaints, but the lazy woodworker in me was not happy with the amount of work and the long application period. As someone who mostly uses Shellac and it used to applying several coats a day this process was painfully slow. I don’t think that is a reflection on Masterpiece Wood Finish but just a commentary on the type of finish. However looking now at my finished table I am really glad I took the time and effort to create this wonderfully touchable finish. Now my table sits in a corner with its best “come hither” flirtatious look. Put it this way, this is the first piece I have built that my wife noticed and commented on without me having to solicit her opinion.
Here is a short video from The Hand Tool School YouTube channel that chronicles the entire build. I you haven’t subscribed to that channel yet, please do I’m slowly working through every lesson and every project from the last 4 years and now producing highlight videos for everything going forward too.
