Roubo Legs Part 2
In my last Roubo post I halted a crack and filled it using some epoxy and had just laminated together the two inner pieces of the Roubo legs essentially forming the tenon. This time I will add the outer two pieces to form the complete 5″ square leg.
The key to this technique of laminating the boards to form tenons is to make sure that your keep your tenon shoulders square and evenly spaced across all four legs. I followed The Schwarz’s example by using small spacers tacked to each leg.
![]()
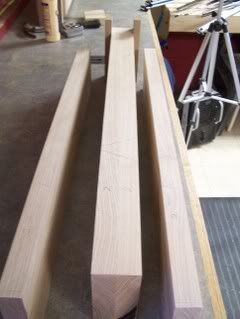
I was certain to make sure these spacers were square to the leg itself while I tacked them in place. Don’t assume that your cuts on the end of the tenon are square along the whole length but double check first. Here you can see one of my legs ready for glue up.
![]()
From here the process was just the same as step one. I rolled on the glue, and started clamping the you know what out of the legs.


Yet another reason you can never have too many clamps!
Once I had the clamps on tight, I double checked that my outer boards were tight to the MDF spacers and the tenon shoulders were completely square, then using a hammer, I knocked off the spacers so they wouldn’t have a chance to get glued in place by squeeze out. Speaking of squeeze out, my general rule for determining how much glue to use in a lamination, is that once I have clamped up a piece I want to see consistent squeeze out all the way around the joint. This glue up definately met that criteria.

Here is where I started to run into problems. I noticed a slight discrepancy when I was tacking on the MDF spacers for the tenons. Once I had them square to the leg I noticed that I wasn’t quite flush along the top edge. As I began to add the outer pieces and flushed them up to the spacers that very minor deviation was telegraphed down the length of the 31″ leg and my long edges were no longer flush.

I recognized this during the glue up, but knowing that I have a good half an inch of extra width on the legs I knew I could plane the legs flat and square after the glue set and have no problems just as long as I focused on keeping the shoulder square. I realized in hindsight that my end cuts on these individual boards were not right at 90 degrees because the build up of dust and chips on my table saw was bumping the work out away from the miter guage fence just slightly. Yet another reason to keep the shop clean while you work. Also a good reason to build in extra length and width to allow for some clean up space after glue up.
I pulled the clamps off and used my Cabinet scraper to knock off the dried glue.

Here is a good shot along the length where you can clearly see the deviation caused by imperfect end cuts.

This was easily corrected by making a visit to the jointer to flatten one edge and then I rotated 90 degrees to ensure the other face was square. From here it was off to the planer to bring the legs to their final 5″ square size. As I approached the planer I still had 1/8 to 1/4 of an inch of extra to play with so it was no problem to get the legs complete flat and square.

I had not cut the leg parts to final length yet and was glad I did since I ran into that little problem getting the legs totally flush. Once I have the legs flat and square I need to trim the bottoms flush.

This presents a little problems considering the 5″ square size. My table saw only has a 3″ depth of cut capacity. I could have cut the legs flush using my bandsaw, but balancing this 30+ lb leg on that high bandsaw table didn’t appeal to me nor was I confident in my ability to keep the leg completely square. I would then have to go back and clean up the mill marks anyway.
Instead I chose to use the table saw to make the cross cuts. I fashioned a tall and long auxillary fence for my miter gauge and added a stop block 33″ from the blade. Making one cut then rotating the legs 180 degrees allowed the second cut to remove the waste.


It seems that no matter how hard you try to align everything that this kind of cut never seems to line up completely. This case was no exception and I ended up with about 1/32″ deviation on the bottom of the legs. I anticipated this and actually was looking forward to correcting the problem as a warm up to the time when I have to make the final cross cut on the end of the bench top.

I chucked up a 2″ flush trim bit in my router and aligned the bearing with the deeper side of the table saw cut and went to work.


While it is not imperative that the bottoms be perfectly flat, I wanted to make sure that they didn’t rock. Even then once all four legs are attached with a approximately 300 lb top on top of them, I’m sure they won’t rock at all. But why not use this opportunity to practice some techniques. My final step was to chamfer the bottom edges. I aslo knocked off the long corners because I kept cutting myself on them since they were so sharp.

Looking back, I’m not so sure that I would build the legs this way again. It seems to be much more work to laminate the legs with the tenons already formed than to just glue up a 5″ square blank and cut the tenons afterward. In this case I probably could have used only 3 boards to form the total size instead of having to plane down the wood needlessly to make 4 parts that equal 5″. Using either my table saw or bandsaw, I would have made quick work of the four tenons and I could refine them with a shoulder plane.
Oh well, next time I build something like this I’ll do it that way.
