Restoring a Vintage Toothing Plane
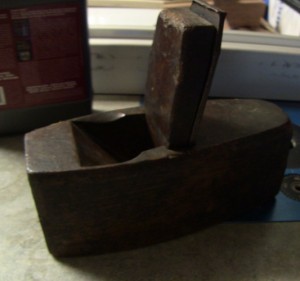 I got a great deal on an English made wooden toothing plane recently and it just came into my shop. I thought this might be a good opportunity to share with you all my process for taking a vintage plane and setting it up for use. If you did your quality control while buying there shouldn’t be that much work to get a great user again. Frankly if the plane has issues with the body or even the wedge, I usually don’t buy it. There seem to be so many on the market these days that I just keep looking.
The first thing when I get it back to the shop is to give it a once over and see where it may need work. I check to see how the iron mates to the bed and the wedge to the iron. Nothing exact at this point, I’m just looking for a firm fit. So I put the iron and wedge in place, seat them with a hammer and check to see if there is any wiggle. None here so I move on. See how scientific that is?
I look over the sole of the plane and see how flat or not it is. Depending on what kind of plane it is and how I will use it determines how much time I spend doing this. In the case of this Toothing plane, I plan to use it for finer work in keying woods for veneer and the occasional figured board clean up. The fine tooth pattern and high scraping angle of this vintage plane will be better suited for finer cuts. Because I will be taking light shavings, I do need the sole to be very flat.
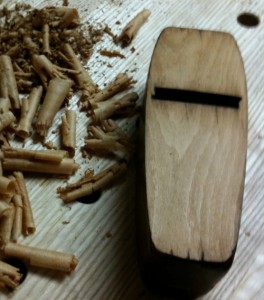 What better way to flatten the sole of a plane than with another plane? I secured the Toothing plane sole in my leg vise and very quickly flattened and cleaned it up using my Jack then Smoothing planes.
This process also gives you a good clue at what is underneath all that age, dirt, and tallow. In this case, we have a beautiful Beech body that is sound. No cracks to be seen. In this shot you can see I still have a low spot at the heel and just behind the mouth. I’ll work out the heel low spot, but I’m not worried too much about behind the mouth. Usually in front of the mouth is a spot to be very conscious of. It may not be that important here, because the toothing plane has a naturally wider mouth to make room for shavings. Also the toothed cutting action will help remove tear out so you don’t really need to rely on the tight throat and flat sole in front of the blade.
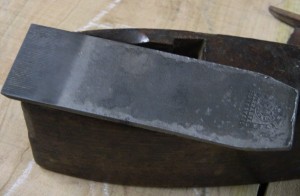
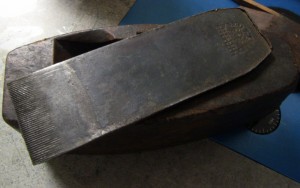 I feel pretty good about my plane body so I turn my attention to the iron. It is understandably rusty, but not over the hill at all. Unfortunately someone decided to adjust this blade using a metal hammer so the top of the iron is mushroomed out of shape. There is not much I can do about this now but it is something to think about when using wooden planes.
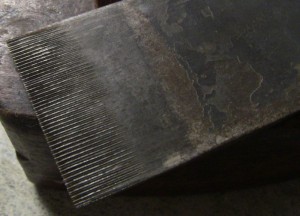 I want to remove the rust as best I can with a particular focus on the toothed edge. Rust is like an animal that will continue to eat until you eliminate it. Inside the little crevices of the teeth rust can quickly change the blade to an untoothed iron.
I have used many products for this from Naval Jelly to good old fashioned elbow grease and sandpaper. The best thing I have found so far is Evapo-Rust. While it will work on the spot just by wiping it on and wiping off, I prefer the lazy man’s way: set it and forget it.
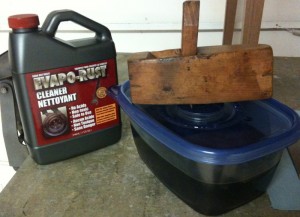 I filled a container with Evapo-Rust to fully submerge the blade and left it to soak for a few days. It won’t hurt the blade so if you forget about it for a week or so, no worries. This blade soaked for 3 days. I pulled it out and rinsed it off with soap and water, then did a little scrubbing with some steel wool to polish things up a bit. This iron is well over 100 years old so don’t expect it to look brand new, (would you really want it to??) but you can get it very clean. The Evapo-Rust people recommend after cleaning and rinsing to then dip the iron again but this time let it dry. This supposedly adds an element of rust protection going forward. I figure why not right?
Now it time to flatten the back and off to the grinder to clean up and/or establish a 25 degree bevel. Toothing blades are sharpened exactly like non-toothing irons. Flatten the back, grind a bevel and hone. The teeth are on the flat face so they don’t interfere with sharpening at all. I grind the bevel then hone the blade up to 8000 grit on my water stones.
Now I load up the plane and take a few test cuts. This is really the litmus test to see if additional work needs to be done in opening up the mouth or refining the mate of iron to bed and wedge to iron. If you don’t have a perfect fit, then vibration will creep in and foul your cut. There are many ways of detecting where your faces don’t mate well, but the old guys generally knew best and the soot method is my preferred method. Check out Bob Rozaieski’s video on bedding a plane iron, I can’t cover it any better than that.
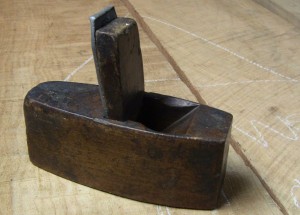 With this plane, I am fortunate that everything is mating well and not interfering with the quality of cut so now I’m ready to get this little plane back to work.
Stay tuned for an upcoming video where I will demonstrate using this plane and pit it against a modern toothing iron in a bevel up Jack plane to compare and contrast them.


