Tool List
 I get a lot of questions about what tools are needed to get started in The Hand Tool School. I tried very hard to keep the list short as I want to teach fundamental skills and wean away the reliance on specialty planes and such to only do one job. That is not to say that these tools do not have a place in our shops, but learning to cut a joint with saw and chisels forces you to improve your fundamental tool skills. That being said here is my recommended list for the first semester:
Planes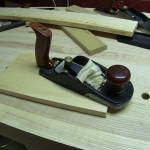
- Scrub Plane: this is your thickness planer. The English Fore plane would also suffice, or even a Jack plane, but the smaller footprint of the scrub can be double to quickly plane a board to width as well as thickness.
- Jointer Plane: this is used to flatten and true your boards. For most furniture projects the 22-24″ sole length is a must. Shorter versions could be used but I think you will get the best results with a longer plane unless you are only building small projects.
- Smoothing Plane: this is your sandpaper. The smoother should be set to take a very thin shaving and have a dead flat sole with a tight mouth. I frequently use my Veritas Bevel up smoother because I can change blades to handle figured wood or straight grained woods without tearout. At the same time I often use a small wooden coffin shaped smoother as a general usage plane. Because of it’s small size it can almost replace a block plane.
- Router Plane: this is the only joinery plane in the list, but I recommend it because it is so versatile. The jobs that the router does could be accomplished with only a saw and chisel but the router plane will add consistency and repeatability to your rabbets, dados, tenons, and half laps.
 Saws
Saws
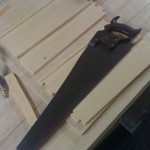
- Rip Hand Saw: a 26″ 5 ppi hand saw will make quick work of all your ripping chores. The pitch is set low enough that the saw will cut fast but not leave the cleanest of cuts. You will be cleaning and trying those edges with a plane anyway.
- Crosscut Hand Saw: a 26″ 8 ppi saw that will allow you to quickly cut your rough stock down to size. Finalized lengths will be achieved with a hand plane.
- Tenon Saw: I prefer a larger saw for greater depth of cut as well as greater balance. I recommend an 18″ saw with a depth of cut at least 3.5″ or more. The filing should be around 10 ppi.
- Carcass Saw: this will do all of your final dimensioning and bench top cutting for joinery. A 12-14″ saw with 12 ppi crosscut filed teeth will suffice.
- Dovetail Saw: this is your fine work saw. Primarily used for dovetails but also high efficient for small notches and any smaller cuts. Rip filed teeth at 14-18 ppi is great but move towards the lower end for a more general usage saw.
 Chisels
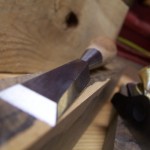
- 1/8, 1/4, 3/8, & 1/2 Bench Chisels: These are the shop workhorses and the sizes I reach for time and again. They should be sharpened for general use in the 30 degree bevel area.
- 1.5 to 2″ wide Paring Chisel: A wide chisel is so useful for defining edges of joints, paring away waste from the saw, or general chamfering work. This chisel rarely leaves my hand while at the bench.
- Mallet: I prefer the round carving style mallet, but the typical square faced cabinetmaker’s mallet will work well too.
Drilling
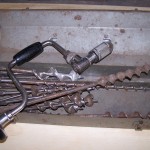
- 10″ Swing Brace: this will handle just about all your drilling chores from 1/4 up to and exceeding 2″ wide bits. The majority of drilling done in the first semester will be for peg holes and mortises
- 1/4 & 3/8″ Jennings Pattern Bits: these two sizes will take care of 90% of the mortise work as well as pegs and drawbore holes.
Marking
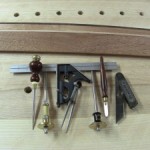
- Wheel Marking Gauge: I recommend having two of these as most joinery tasks require several settings and being able to set your gauge and leave it for consistency throughout the process
- Bevel Gauge: used for anything other than a 90 degree angle. We will layout our dovetails with this.
- Square: a top quality square is a must for proper layout and trying of lumber
- Marking Knife: use this instead of a pencil for air tight joints. I like the spear point knives with one flat face.
- Dividers: a useful tool for laying out equal distances or spacing elements evenly across a board.
With this kit of tools, the woodworker can build just about anything with straight lines. Curves add another style of saws and a selection of rasps and files or shaves, but for the first semester we will stick to the straigth lined stuff. For that matter, not all of these tools will be needed at the outset so the beginner can add to their kit as they go along. We start with sawing and milling so one could start easily with the 3 bench planes and the 2 larger handsaws.
Throughout the semester I will highlight different ways to approach operations using tools not on the list but will always demonstrate the fundamental way to do it using only these tools.


