What Hand Tools Do I Really Need?
I hear from a lot of woodworkers (or woodworkers-to-be) who are so excited to start using hand tools. Either in that same correspondence or a few minutes later I get another message from the same woodworker who has just been sticker shocked by how much this hand tool thing is going to cost them. One could make a case that the hand tool route is cheaper than going with power tools, but I think quickly that case would get very thin. Woodworking is expensive and this is before you even head to the lumber yard!
Yes, yes, I know one can save a bundle by buying vintage hand tools. But even those have gone up in price a lot and with them comes a lot of time spent restoring a tool that you may not actually know how it should perform. In other words, even buying all antique tools can result in a pretty hefty sum of money.
Usually I spend several minutes talking them back from the ledge and helping them understand that not every tool is needed right away and that beginner hand tool lists are something to strive towards, not a prerequisite. This immediately begs the question,
'So what tools do I actually need right now?'
This question is answered very differently depending on whether the asker is starting with no tools at all or if they are like me, a power tool user converted to “the light”. The list of tools also depends heavily on what it is the woodworker wants to make. This “it depends” answer is why everyone has a different list of “must have” tools. It is also why so many people get frustrated and often spend lot of money on tools they don’t need or tools that end up stunting their skill growth.
The Beginning Hand Tool List
 So here it is folks, the actual list of hand tools you need to get starting building stuff by hand.
- Jack plane (Stanley #5)
- Hand Saw (backless saw ~26″ in length)
- 1/4, 3/8, and 1″ chisels
- Back Saw
- Coping Saw
- Marking Gauge
- Square
- Some kind of sharpening set up (stones, sandpaper, whatever)
That’s it. Frankly unless you plan to introduce some curved elements into your first project, you can ditch the coping saw too. But frankly those can be had for $10 or less at the hardware store. Let’s look a little closer at this list.
The Jack Plane
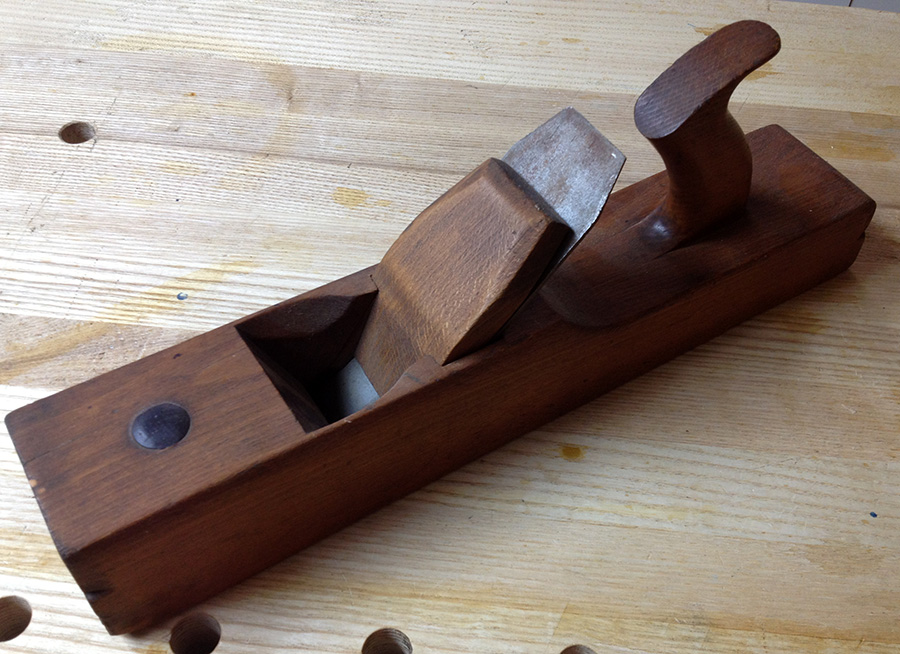 This is your only hand plane. It will take rough boards to flat and square and even to finish ready. You might want a second blade so you can set one up with a big cambered (8-10″ radius) edge for heavy stock removal and thicknessing. Or you can just clip off the corners of the blade and use the plane for medium to fine work. The Jack has the perfect length for getting most furniture sized parts dead flat, yet its short enough that while preparing for finish with a whisper thin cut, it doesn’t demand stupid flat surfaces. You can use this plane to taper table legs, shoot board ends, plane bevels, or any number of other tasks. This is one area where I strongly recommend spending some money. Jack planes can be had for a song on the antique market, but if you have no concept of how a well tuned plane will work then you might be doing yourself a disservice and perhaps buying a new plane is the better bet. When you think about the major role this plane will play in your work decades into the future, the investment of $250-ish dollars will seem like a small price to pay. Alternatively, if you know someone willing to help you tune up that plane then by all means go vintage for $20-50 and learn how to restore it but make sure you have a tuned plane that you can use so you know how it is supposed to work. I can’t stress this last point enough. I have met and taught many woodworkers who struggled mightily with planing only to have their eyes opened when they used a plane that was sharpened and tuned properly.
Hand Saw
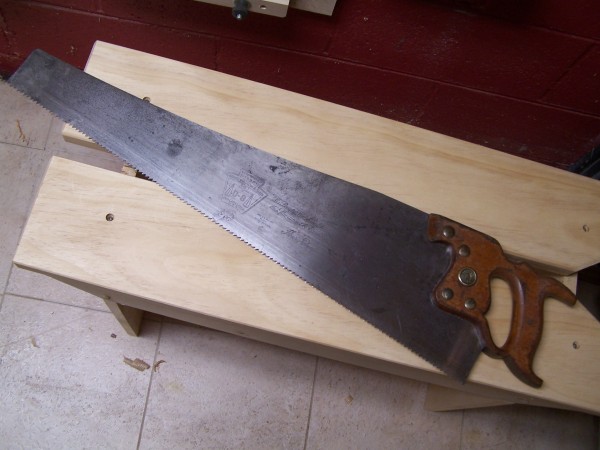 This is not a “panel saw”. This name often is attributed to any saw without a back and that is incorrect. A panel saw is a specific kind of backless saw that runs 18-24″ in length and whose teeth have a finer pitch (higher number) making them more suited for 3/4 and thinner parts. In other words woods that are already planed on 4 sides (S4S). There are modern makers who produced outstanding panel saws, but when you try to break down your rough sawn 4/4 lumber you will become frustrated by how slowly these saws cut. Add in 8/4 and thicker lumber and it becomes a torturous slog. No for sawing rough lumber into approximately size parts, or for that matter any sawing that you do where the surface will be cleaned up later with plane or not at all should be done with a hand saw. By definition a “hand saw” is 24-28″ long and it is pitched (number of teeth per inch) lower to be more aggressive in use. At this early stage, don’t worry about whether this is a crosscut or rip filed saw. You’re welcome to look that up but tooth geometry will only confuse the issue right now. Buy a saw for length and pitch. Crosscut saws will usually be pitched at 8 tpi and rip saws around 5 tpi. When just starting out I think a crosscut saw will be more forgiving as it will cut cleaner and a bit slower which is a good thing until you are confident of your ability to saw to a line.
Like the Jack plane, I think you should spend some money here to get the saw tuned properly. The bad news is that there aren’t really and modern manufacturers of hand saws. All the current guys just make panel saws. For this you need to go to the antique tool market. In my opinion, sawing is a much more important skill than planing so this is a tool you will want to get right. Use a respected tool dealer (my favorite is Josh Clark at Hyperkitten.com) and send the saw off to be sharpened by any of the myriad of guys out there offering this service.
There is an adage that says “a poor worker blames his tools”. In the case of sawing I think this is one area where you can blame your tools. A well tuned saw will cut straight despite a lot of bad technique, but a crooked or poorly sharpened and set saw won’t cut straight no matter what you do with it. Don’t skimp here and buy a good saw. Expect to spend at least $50 on the vintage hand saw and another $50-60 to get it tuned. This saw will get used on every single project you build for years to come so do it right now.
There is a possible shortcut here in that most home centers now will sell “hard point” saws that have a weird tooth geometry that looks more like a Japanese saw and can be had for $25. This will get you started breaking down stock to size but they are a bear to rip with. Very slow with a toothline that clogs up quickly. I have one of these saws myself and it lives in the trunk of my car where I use it often at the lumber yard to crosscut long boards to fit in my car. It cuts quickly but isn’t easy to steer nor will it cut a straight line on autopilot like a well tuned saw. But it gets the job done and does it cheaply.
I consider this a “band-aid” solution and your skills will thank you if you eventually get a good saw that will help you plane better and speed up all your work.
Chisels
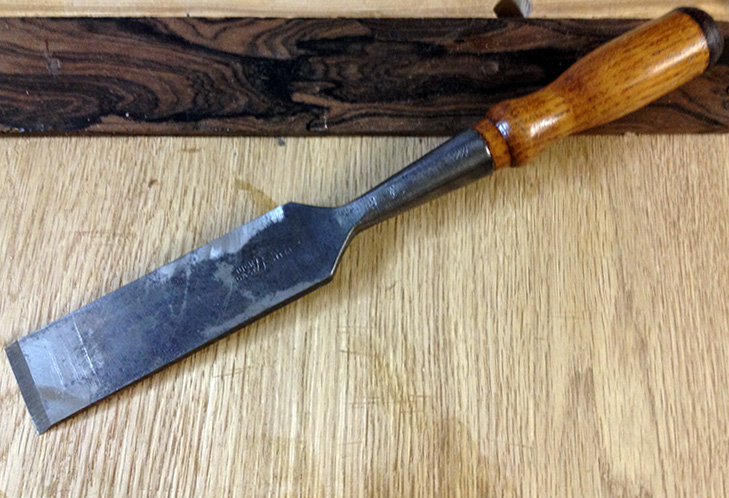 1/4, 3/8, and 1″ chisels are all you need to start. In this case I say buy vintage. Setting up a chisel is simple process and a skill that you need to learn. I won’t go so far to say all steel is the same, but for woodworking I don’t want to over analyze the steel in my chisels. Some of my favorite chisels are 300 years old. The steel is easy to sharpen and they get super sharp. At the same time by only buying 3 chisels to start, you can go with a premium make for about $50 a chisel. But on the vintage market, you could expect to get all 3 chisels for $25-30. I don’t care if they are socket handled or tang handled or what the side bevels look like. These will be your go to tools for joinery and refining shapes. When starting out I prefer to focus on sawing good joinery and using chisels to pare to final shape. There won’t be a lot of heavy chopping outside of cutting mortises. This is why I recommend 1/4 and 3/8 sizes as those will match 90% of the mortise you cut. The 1″ chisel will be your problem solver. Used as a paring chisel it will refine the fit of a tenon or half lap. It will flatten the bottom of a rabbet or dado that you chopped to shape with your narrower chisels. Chisels are probably the most versatile woodworking tool out there and once you are comfortable using them, literally anything is possible!
Back Saw
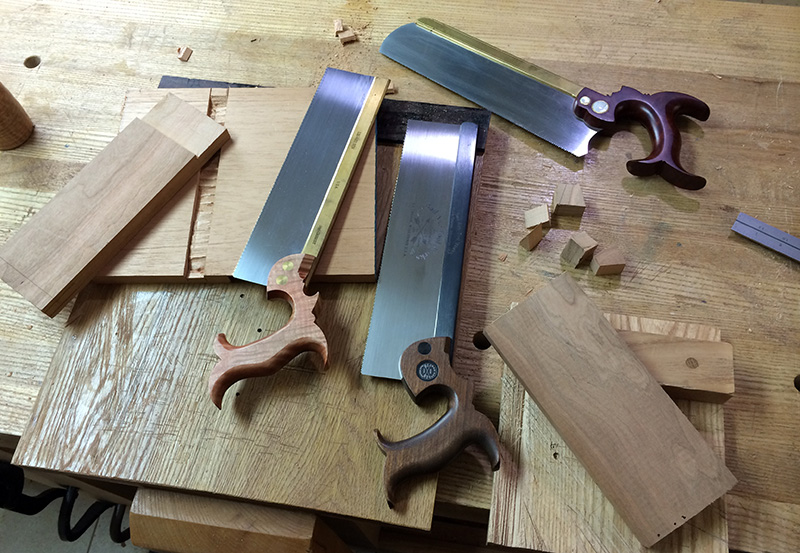 This is your precision saw. You will use it to cut all of your joinery. You will use it to cut smaller parts to final length. It should be fine tuned so that it will produce joints that require no additional work. A quick glance and it will be very confusing with so many kinds of back saws out there. Dovetail, Tenon, Sash, Carcass, etc, etc are all different configurations of length and depth under the back and tooth geometry. They all have their place but I firmly believe when starting out a carcass saw will serve you best. By definition this is a crosscut filed saw of medium length and depth. It will allow you to cut dovetails, tenons, and everything in between.
Like the Jack plane, this is an area where I recommend buying a new saw. There are a huge number of modern makers and a wide range of prices. I have tried many of the modern brands and they all work great. Let your budget be your guide. The vintage market is another option but like the hand saw, pay the premium to get a saw from a respectable dealer and have it sharpened and tuned up by and expert. A bad joinery saw will cause so many problems and increase your frustration exponentially. The goal with all joinery should be a good fit right off the saw. Without a back saw you can trust this will get very difficult. Don’t worry you will have plenty of time to develop a saw problem later on and this is an area where multiple saws can really be a boon to your work. For now, go vanilla and the carcass saw is your answer.
Coping Saw
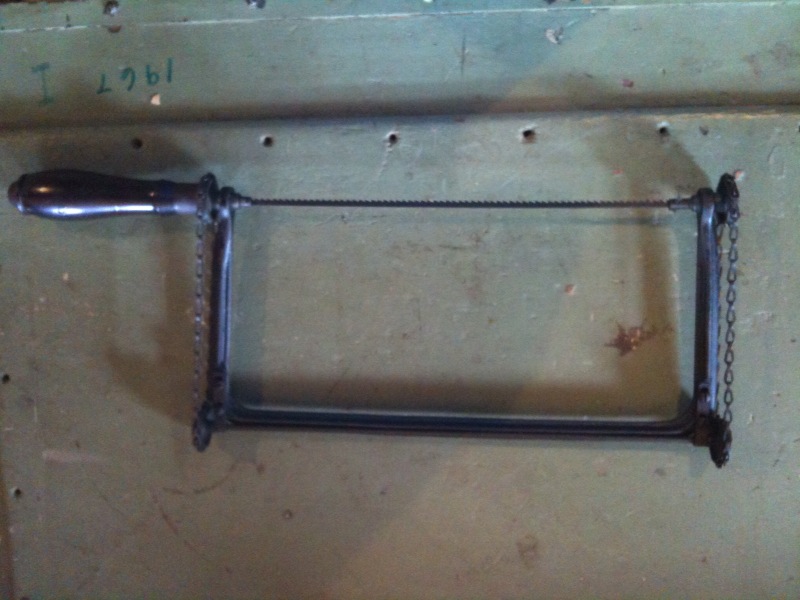
Interesting Steering Mechanism for your Coping saw
Like I said above you can skip this one if curves are not part of your designs right now. A coping saw is really helpful when removing waste on dovetails but as usual a chisel can do that work just as easily. I throw this into this exclusive list mainly because I want new hand tool users to start accepting that anything can be done with hand tools. There are no capacity limits or angle limitiations and anything your brain can dream up can be done with a saw and chisel. The coping saw allows you to break out of the straight lines and you might be shocked at how adding a gentle curve to the underside of a coffee table apron changes the look of the entire piece.
One word of warning, the harder part of introducing curves is not sawing them, but rather cleaning them up for finish. This can be as simple as sandpaper or as complex as several rasps and files. Just know that this is a situation where one tool begets another.
Marking and Layout Stuff
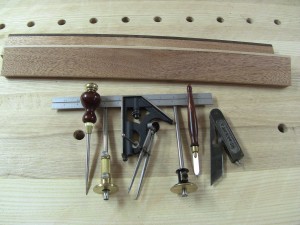 Layout and measuring tools seems to be the home for gadgets and gizmos of the woodworking world. Everybody has a solution that will eliminate all your problems. I have a lot of marking tools but starting out a square and marking gauge are all you need. The quality of the square has some wiggle room too and even the metal ones can be easily adjusted. A combo square is a good option as it will allow you to slide the rule and lock it into place for specific layouts. So a strong locking mechanism that holds the rule steady is a big deal. A marking gauge is a must as it add repeat-ability to your layouts. Setting the length for a tenon shoulder and being able to get that mark identical on all 4 aprons of a table is essential. The wheel gauges are probably the easiest to use when starting out and don’t run much damage to the wallet. At the same time there are vintage marking gauges everywhere and having more than one is always a good idea so you can set a gauge and leave it throughout a project while having another for miscellaneous set ups.
Notice that I am not recommending a marking knife at this stage. They are very useful but an X-acto knife from an art store or a pocket knife makes a great stand in. There is nothing wrong with a sharp pencil either and you will learn quickly that sometimes a pencil mark is preferred over a physical cut on your piece.
Sharpening
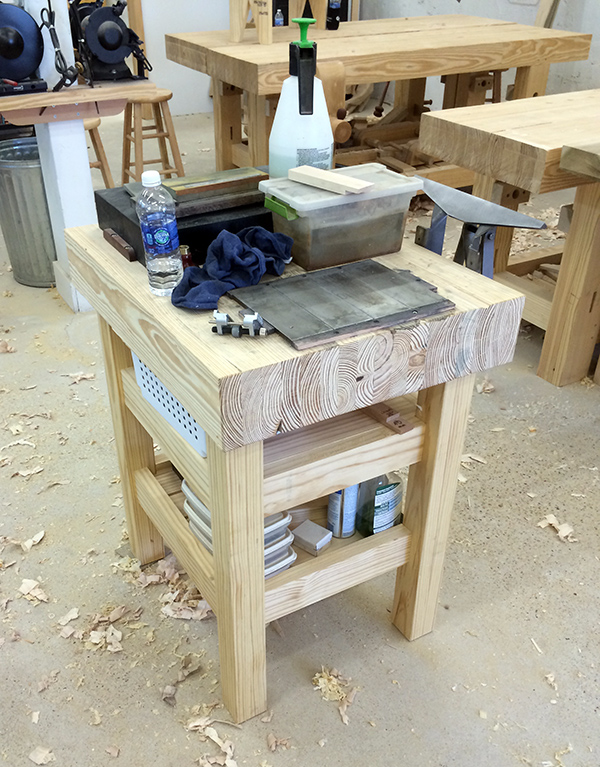
I love this sharpening island. No frills and always close at hand.
Finally we come to sharpening gear. It all works and there are as many systems and enthusiastic supporters of those systems are there are fish in the sea. This is another journey of discovery that you must take that will require some trial and error. Frankly only you can make the decision on which method of sharpening will be yours and this takes time with the blade in hand on the sharpening stone/paper/wheel/etc. I bring up sharpening mainly because it will cost you something so be prepared that after you have spent money on tools you are not done yet. Sharpening is as necessary to woodworking as the wood itself.
Now What?
There will be many of you still scratching your head and not sure where to go from here. There are many brands of tools out there and deciding which one of the types listed above is half the battle. The minute I start making brand recommendations is the minute people start getting angry at me because their brand of choice has been slighted. I’m a believer in the “buy your last tool first” mantra to a point and with the tools above that I labelled at critical I recommend spending some cash on getting them right now. Stuff like gauges and chisels can wait until you know better what YOU need.
Am I leaving some tools out? Absolutely! This set of tools will make some things harder that something like a router plane would make easier. But this starter collection will build your skill set like none other. It will emphasize good chisel mastery which will save your butt every day of the week. Chisels go where no other tool can go! So yes, you will need some more tools and you may need them quickly into your first project. But the key is you won’t have to get them since this bunch of tools will allow you to get anything done. This bunch of tools would allow you to complete any of the projects in Semester 1 of my Hand Tool School and also help you to build the skills to build your own next generation of tools. Then with a few projects under your belt, you will be better informed about which tools you need to get next.
What Did I Miss?
Here is your chance to tell me how wrong I am. I’d love to hear what tools you felt were left off the list and why. Explain your reasons in the comments below and be sure to include whether you think buying new or antique is the way to go.
